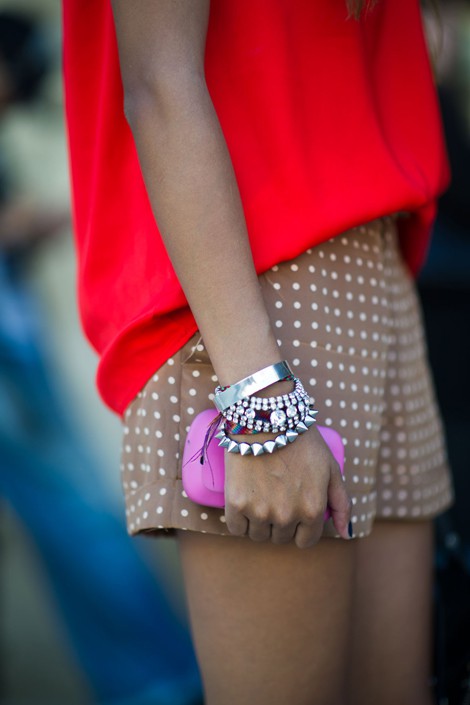
{everyone needs a side of sparkle}


10/31/2011

treats, not tricks


Ah, Halloween... property damage, slutty nurse costumes, and the indescribable taste of candy corn. Oh, yeah and pumpkins and trick-or-treaters. Discouraged by the 1/2 inch of snowy-slush on the ground (really? it's not even November), and since Violet doesn't quite grasp the whole Halloween concept anyway, we're going to celebrate at home by making these delicious treats. The recipe's ingredients are much better than the kind one might discover while pillaging her youngster's treat bag and these candies are scarily easy to make. No tricks required.

INGREDIENTS
1 cups creamy peanut butter
¼ cup unsalted butter
¼ cup light brown sugar
1¼ cups powdered sugar
Melted milk chocolate (I like Ghiradelli)

DIRECTIONS
For the filling:
In a medium saucepan, combine peanut butter, butter, and brown sugar. Heat over medium heat until completely melted and starting to bubble. Remove from heat and stir in powdered sugar, 1/4 cup at a time until thoroughly combined. I use a stand mixer to blend mine. Taste and add a pinch of salt if you find the mixture too sweet (salt content in peanut butter varies). Cool completely.
For the candies:
Line a mini muffin tin with paper liners. Roll peanut butter filling into small balls, then flatten them a bit. Pour some of the melted chocolate into the liners and then refrigerate until firm. Next, place a peanut butter filling on each chocolate base and pour more chocolate on top to just about fill the space in the cups, refrigerate until firm. Enjoy your homemade peanut butter cups!

image and recipe adapted from brown eyed baker, original recipe from The Brooks Stead
Pin It

10/27/2011

bunnetics, anyone?


Flavorwire is my latest web-crush and this post about obscure 80's VHS cover art is too good not to share. The pithy comments just enhance the viewing experience. Here are my favorites, but check out the full post for all fifteen covers.


Pin It

10/24/2011

diy project no. 006: image transfers


I came across this DIY project at DesignSponge  over the weekend and couldn't wait to share it with my readers. This is such a great way to spruce up your dinner table for the impending holidays. Speaking of which, wouldn't some decorated tea towels make perfect little gifts? For images check out joseph cornell box or mellowmint's DeviantArt site (just full of downloadable hi-res goodies)!

materials:
1. photos of food, dishes, figurines, plates, etc. (anything you want, make sure it high resolution)
2. scissors
3. inkjet printer transfer paper
4. inkjet color printer
5. napkins and placemats (mine are from ikea and cost less than a dollar each)
6. iron
7. computer

instructions:
1. if you don’t want to take the photographs of objects yourself, you can find some great images in food magazines, or cookbook images, or just search flickr for yummy food photos. upload your photos to your computer and play around with them to get them to be the size you want. make a couple black and white prints on 8.5 x 11 paper to check that you like the size and detail on your photos. you want your images to be something you can cut all the way around to have a freestanding object. the transfers print in reverse so if that matters to your object, you need to reverse the image on your computer before printing.
2. when you have the images ready at the size you want them to be, print them in color on your transfer paper according to the directions on the package of the transfer paper. if you have the option on your printer, you should choose the highest quality of printing.
3. allow the transfer prints to dry. meanwhile, iron all the wrinkle out of your placemats and napkins on high temperature with no steam. allow these to cool.
4. cut out your shapes with scissors. you want to cut all excess off your shapes and cut right up to the edge of you object.
5. lay the transfer paper down on the fabric and iron it down according to the transfer paper instructions.
6. continue following the transfer instructions for cooling, peeling off the backing, and setting the image.

images via Design Sponge
Pin It

10/20/2011

changes

 
Since becoming a mother, I've noticed several small, but dramatic changes in my approach to life. I'm not talking about the big changes (more on those in a later post). Just a few seemingly small ways in which I do things differently now. Here they are - you might find some are ridiculous "issues" to have in the first place, but we all have our hang-ups, right? Please don't judge... but feel free to laugh!

I'm fearless when it comes to killing bugs. And I mean big, juicy awful bugs that previously I would just barely manage trap under a cup and wait for Hero Hubby to take care of. Now they just get squished by moi - sometimes without a tissue... eek.

I'm no longer superstitious in my mother's basement. It used to be, even up until a few years ago, that I still carried the paranoia that a trapped soul would devour my own if I lingered too long in the basement. Not quite a fear of the dark, just a creepy feeling every time I went down there. My mother's basement is not out of the ordinary - it's just a silly hangover from my youth. Present day? I could care less. Go ahead, ghost, take me away from my nagging children.

I love doing the dishes. Prior to my lovely brood, washing the dishes was not an activity I rated high on my "likes" list, nevermind my "loves" list. My how things change. Doing the dishes is like a zen state - a form of meditation. No one will interrupt me, lest I enlist their help.

Very small things make me happy. This one is almost in the category of big changes. Never before had I elated at discovering the Market Basket circular in the mailbox every Wednesday morning, nor did I think twice about the delight found in taking more than three sips of a steaming hot cup of coffee. It is said that it's the little things that make all the difference. Right now I understand that more than ever. Ah, the little things... like getting to write an entire blog post (almost) uninterrupted.
Pin It

10/18/2011

oh, wear!

options to boot

It's a good thing I'm not actually being forced to choose one pair of boots for this lovely wool cape that begs to be donned while strolling through the countryside whilst arm in arm with your love. Alas, I do not have time for strolls in the countryside nor do I have the extra funds for the hefty price tag on this darling number. As investment pieces go, this is well worth its price and it is so very versatile. Sigh.


Pin It

10/17/2011

pour the pink

What a wonderful time with friends we had this past weekend. Rosé champagne, homemade apple pie, red wine, cupcakes... how superb! It was a treat to be able to spend an evening at our friend's home, enjoying their company and delighting in how much their twin girls have grown since the last time we got together. Violet was in awe of her playmates and eager to show off her little sister. Later in the evening, as we toasted with rosé in hand to baby Laela, I paused to think about the three other children sleeping upstairs. Little girls they are now, but women they will be someday... perhaps mothers as well and I'll look forward to toasting with them, a glass of rosé in hand.
Pin It

10/14/2011

a custard for fall seasons

Normally, I would not be attracted to a savory custard, but I am attracted to thinking outside the proverbial box and this recipe from the catbird seat in Nashville, TN does just that. A hint of maple syrup and the earthy tone of truffle oil sounds like a wonderful match. This might just be my Sunday afternoon cooking escape endeavor. Of course, that does depend on having an hour of kid-free time (which is a premium these days). I'll be happy even if I only get as far as making the bacon chips!

INGREDIENTS
6 thinly sliced bacon strips, cut into 3-inch strips
1 cup heavy cream
1 cup whole milk
¼ cup maple syrup, plus more to serve
4 sprigs fresh thyme, plus more to garnish
2 whole eggs
2 egg yolks
Truffle oil to taste (optional)
Pine extract to taste (optional)

DIRECTIONS
1.    Make the bacon chips: Preheat the oven to 350°. Line a sheet pan with the bacon slices and set another sheet pan over the top to weight down the bacon. Bake for 15 minutes or until crisp. Set aside to cool. Lower the oven to 300°.

2.    Make the custards: In a medium saucepot set over medium-high heat, combine the heavy cream, milk and maple syrup. Bring the mixture to a boil, then reduce the heat to medium-low heat and simmer for 10 minutes, stirring frequently until the syrup is completely dissolved. Add the thyme sprigs, remove the pot from the heat and set aside to steep for 15 to 20 minutes.

3.    In a medium bowl, whisk together the whole eggs and the yolks. Remove the thyme sprigs from the cream mixture and slowly whisk the warm cream into the egg mixture. Add a drop or two of truffle oil and pine extract, if using. Pour the custard into 12 six-ounce ramekins and bake until the custard is set, 20 to 25 minutes. Set aside to cool. Serve with maple syrup, bacon chips and fresh thyme.
Pin It

10/13/2011

dreamy dishware

Just when I got my mind around not purchasing another baking dish or serving platter (I have a thing for ceramics) I saw these gorgeous dishes at Anthropologie. We've been dining off of our basic white IKEA plates for so long and the lively pattern on these dishes is so refreshing. I know they will make whatever I serve on them look better... I wonder if they will make my cooking taste better? Either way, a page has come loose from the Anthropologie catalog and has mysteriously found its way into Hero Hubby's mail pile. He just might find it by Christmas.
Pin It

10/11/2011

oh, wear! midi madness

midi madness

After seeing this post on one of my favorite blogs, Lucy Laucht, I was inspired to drag out my black midi skirt that has been living in the back of my closet for the past several years. It's perfect for these last few warm fall weeks. I wore mine with a cream colored dolman sleeve top and peep-toe wedge sandals. A scarf is a must have for me this time of year and I'm really liking this leopard print pictured above. I love the color combo of tomato red and tan leather. It might be necessary to invest in a second midi skirt!

skirt | top | shoes | bag | bangles | scarf | sunglasses


Pin It

10/07/2011

hello birdie


Earlier this morning I sat down to write a blog post when I heard a thump on the glass door of the breezeway. I got up to investigate. When I opened the door to the chilly, damp morning I found a small woodpecker laying defeated-looking on the threshold. After a little nudge and few strokes of affection on top of its head, the bird hopped down the steps and zipped off into the bright blue sky.

It was a nice moment; seeing something falter and then take flight reminded me of how many times us humans are forced to take a pause from the action in life. Whatever that pause may be (great or small) it's important to allow... and hope that there's someone or some force to give us a little nudge and affection to help us on our way again.
Pin It

10/06/2011

iSad


I was just a girl all of five years old when I first gazed upon the Apple IIe. I would stare up at the green glow and play number munchers with reckless abandon until my father would walk into the room and announce that it was my bedtime. Times have changed since then and Apple products have gone through much transformation. In light of Steve Jobs' passing, I'd like to take a moment to reflect on the transformation and vision he brought to the Apple brand. Thanks, Steve, for making a great product and bringing such innovation and inspiration to the world of computers and technology.

Wired Magazine put is best:
A visionary inventor and entrepreneur, it would be impossible to overstate Steve Jobs’ impact on technology and how we use it. Apple’s mercurial, mysterious leader did more than reshape his entire industry: he completely changed how we interact with technology. He made gadgets easy to use, gorgeous to behold and essential to own. He made things we absolutely wanted, long before we even knew we wanted them. 

image via wikipedia
Pin It

color therapy: terracotta


Terracotta, or "cooked earth," is a color that looks spunky in just about any situation and can be found in so many unexpected places. How ethereal the color can be in this silk cami... what a rich burst of color this shade brings to a dining area.

Pin It

10/04/2011

dinner tonight: mujadara


Muja-da-whaaaat? Mujudara, also known as lentils and rice, is a traditional Lebanese dish. Just thinking about it reminds me of the distinct savory smell in my grandmother's kitchen when she would make a large pot of this deliciously hearty soul-food. My grandmother cooked with a pretty basic recipe - lentils, rice, onions, salt and pepper. I recently discovered this recipe and was inspired to make my own version of an old family classic.

INGREDIENTS
1 c lentils
3 Tbls olive oil
1 tsp cracked peppercorns
1 lg onion, chopped (I like using a sweet onion)
1 c rice
1 tsp cumin
tiny pinch cinnamon
1.5 tsp salt
3 c chicken stock

DIRECTIONS
Rinse the lentils first, then cover with water and cook until tender, but not mushy (about 20 minutes). Drain and set aside.

Meanwhile, add the olive oil and cracked pepper to a large, heavy pot. Cook for just a minute and add onions. Sauté until caramelized, about 15 minutes. Next, add the rice, cumin, cinnamon and salt. Cook the rice just until it starts to turn a little tan in color. Immediately add the cooked lentils and stock. Bring to a boil and then lower to a simmer until the rice is cooked through. 

Serve with a sprinkle of freshly chopped parsley.
image via hannaford markets


Pin It

10/03/2011

dear Instagram...


Dear Instagram,

Why are you only available for iphone and ipad? I love the retro-y look you cast over photos and your homage to the beloved Kodak Instamatic and Polaroid aesthetic. You could make my images impossibly hip, but alas, I don't have an iphone or ipad. 

Boo-hoo,
Marissa 

Lucky for all of us not in the iclub, Daniel Box has created a fabulous assortment of photoshop actions that are much like those killer instagram filters. Here are examples of all the filters. The original image is at the bottom. I especially like "sutro" and "brannan." The next step is to get some prints and see how these filters look in the flesh. These will be so cute printed up as postcards to send to the grandparents. Thanks, Dan, for making these!


Pin It
Related Posts Plugin for WordPress, Blogger...